Create and Modify Questions and Answers for a Product Finder
Introduction
What information do you need to make your customers a good offer? Can they skip a question? What recommendation shall Product Finder 360 show for each of the answers? Is it straight and clear or needs some additional explanation or illustration? Questions and answers go together and make up for a very important part of the digital Product Finder, shaping the flow for a digital conversation with your customer and defining the base of your Product Finder.
Once you've initiated the creation of the Product Finder and defined its basic details, you will be redirected to the Flow editor of your digital Product Finder. This is where you can:
Manage questions: add and modify questions: define if they are mandatory, illustrate them with images and hints, etc; delete a question or remove questions.
Manage answers: add answers, define their types and modify them according to their type: where possible illustrate them with images and descriptions, add default answers, specify which products should be displayed each of the answers.
1. Manage Questions
Questions are your way to get the necessary information from the users. All the questions on your flow should comply with one of the two purposes:
Help users to find the product they need. Answers to such questions should be at some point mapped to attributes of your products - the matching products will be recommended to your customers. (For example, you might ask about the desired color, size, manufacturer or price range and after the answer has been given, the recommendations will only contain products that match these parameters). Please note, that it's important to ask only such questions which will get your users
Help you collect marketing information about your customers. Answers of such questions should always be of a lead generation type.
1.1 Adding a New Question
You can always add a new question to the canvas or to the question bank.
When you are adding a question to the canvas, it is automatically added to the flow (and will be asked if there is a flow rule that leads to it)
When you are adding a question to the question bank, you can edit and change it, but cannot define a flow rule and add it to the flow, unless you've moved it to the canvas. This is a good option if you want to create a draft set of questions but not yet sure, which of them will go to the flow.
1.1.1 Add a Question to the Canvas
In order to add a new question to the Canvas
|  |
1.1.2 Add a Question to the Question Bank
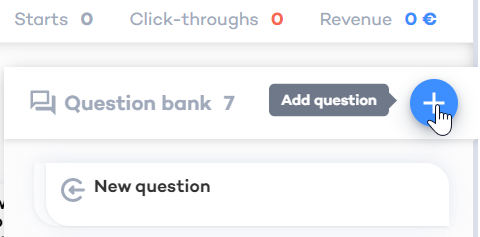
To add a new question to the Question Bank
|  |
1.1.3 Move a Question from the Question Bank to the Canvas
As it's been said, a question in the Question Bank can be edited, but cannot be embedded into the flow and shown to the customers. However, at the design stage, you might find it convenient to keep more questions in the bank than used for the flow.
| To move the question to the canvas, drag it from the bank to the canvas | 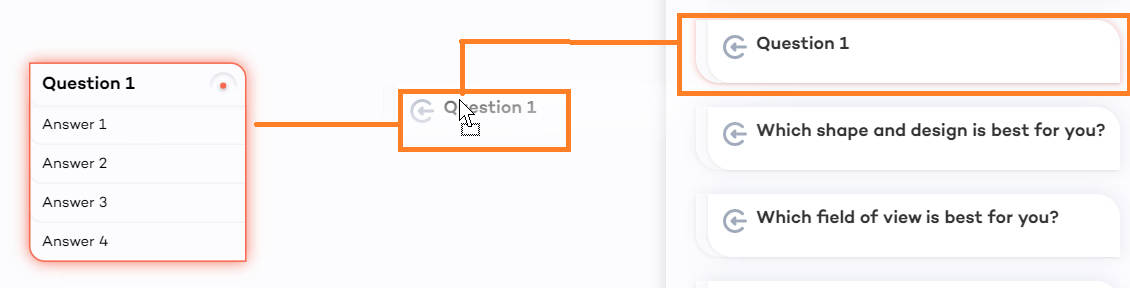 |
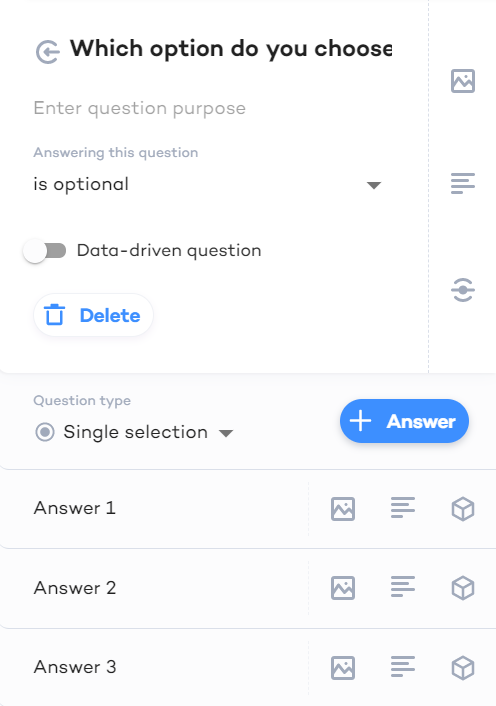
1.2 Modify a Question
You can edit questions that have been added to your template or update new questions, created as described above.
You can start editing any question directly from the flow chart:
The question bank will emerge. Details of the selected question will be maximized. | 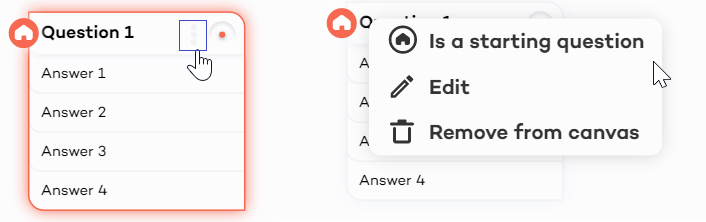 |
You can also click the question you want to edit in the Question Bank. In both cases, you will see the question editor in the Question bank on the right.
1. Change the wording: Click anywhere in the question area to edit its text. Enter blank text or use HTML snippets TIP(You can also double click the question text on the Canvas to change its wording). The changes will be applied in both Question Bank and on the Canvas) | 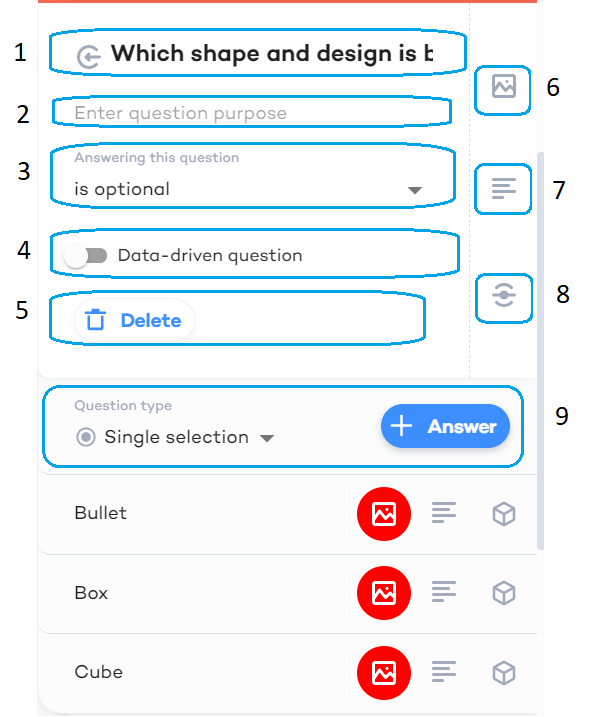 |
2. Define the purpose: Describe the purpose of the questions. This might be a note for future self or a purpose description that will be visible to the customers. (Subject to the question appearance configuration settings).
3. Define if the question is mandatory: Select if the question is optional or mandatory. Optional questions may be skipped by the customer.
4. Make the questions data-driven: If a question is data-driven, the set of answers and their illustrations will be automatically suggested as all the values within a specific column of the product catalog. Learn more about data-driven questions.
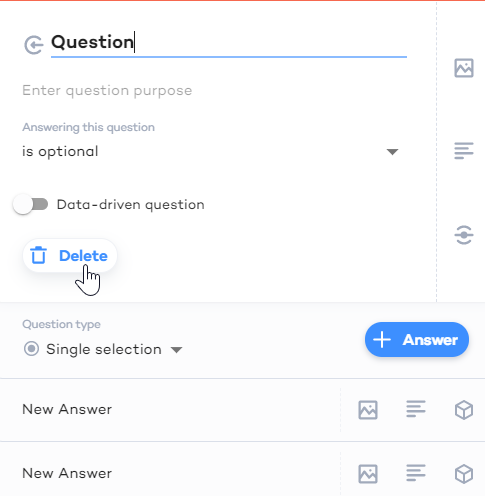
5. Delete a question: This will delete the question and all the rules and settings bound to it.
6. Add an image: Select an image to illustrate your question. Images will help to make your Product Finder more appealing. For more details please see the dedicated article.
7. Add a description: This will be displayed as a hint that can be read by the customers. The description may blank text and may use HTML snippets
8. Define the routing rules: This way you can connect your questions in a flow. Specify the rules that will tell Product Finder 360 in which order the questions shall be asked. Details of the routing rules are described in a dedicated article.
9. Define additional settings of the Product Finder: Currently, this section can be used to define the custom attributes of an Product Finder.
10. Define the question type and add answers as described in the following section
2. Question Types and Answers
All the question types and their examples are described in the Select the Question Type article. To choose the question type, select it in the "Question type" dropdown.
2.1 Question Type Groups
The question type affects all the answers to this question. All the question types can be divided into three groups:
| 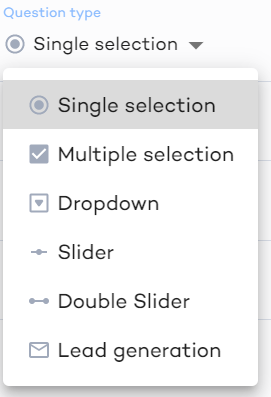 |
When you are changing answers within one group, all the previously defined settings are saved.
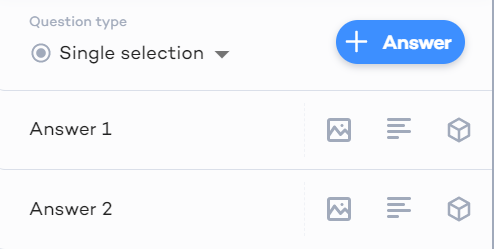
2.2 Add and Modify Multiple Choice Answers
To add a multiple choice answer:
|  |
All the answers you've added will be displayed as options you customer can select from, however you can modify each of these answers separately. These are the settings you can define for each answer of a "Single selection", "Multiple selection" or "Dropdown type"
| Action/Type | Change the order | Add an image | Add adescription | Add mapping | AND/OR relation |
| Single selection | + | + | + | + | - |
| Dropdown | + | -* | + | + | - |
| Multiple selection | + | + | + | + | + |
*Images are not displayed for dropdowns, but they will be bound to the answer if you change its type to a radio button or checkbox.
2.2.1 Basic Settings of Multiple Choice Answers
The following actions may be performed for each of the answers (with some limitations related to the recommendation logic and described below)
1. Change the order of the answers:
|  |
2. Change the wording: click anywhere in the answer area to edit its text. You can use blank text or use HTML snippets
3. Delete the answer: keep in mind that all the answer settings will be deleted as well
Hover the mouse over the answer
Click the trash bin icon (3) that will appear to the right of it
4. Add an image: Select an image to illustrate the answer. Once you've clicked the icon, it will be enough to follow the instructions, however, you can learn more about the ways to add images to questions and answers.
5. Add a description: This will be displayed as a hint that can be read by the customers. The description may blank text and may use HTML snippets
6. Define Recommendation Logic:Define business rules that will be used to decide which products shall be recommended for this answer and in what order the products will be displayed on the Results page. Basically, there are three main parts of the Recommendation logic:
Mapping rules: Defines which answers should be displayed to the customers who have selected a specific answer. (As a simple example, if you've asked your customers what color items they would like, those who have chosen "pink" will be recommended the models that are available in pink), as described in Set Up Product Mapping.
ATTENTION
Keep in mind that you cannot apply answer-based sorting rules for multiple-choice answers (as multiple answers can be selected)
If a specific answer has been given by the customer, the products that meet the bias rule are assigned a specific rank. The products with the highest additive rank are displayed at the top. The products with the same rank are ordered in compliance with the answer-based and default sorting rules, as described in Create and Manage Bias Rules.
2.2.2 Add the Default Text to Dropdowns
You can choose a default text that will be displayed at the dropdown. It will not be treated as an answer but can contain some instructions for the customer. |  |
3.2.3 Define AND/OR Relation for Multiple Selection
If the answer type is "Multiple selection", the customer can select several answers. Therefore, you need to set up the answer relation that will define how to interpret such a choice:
| 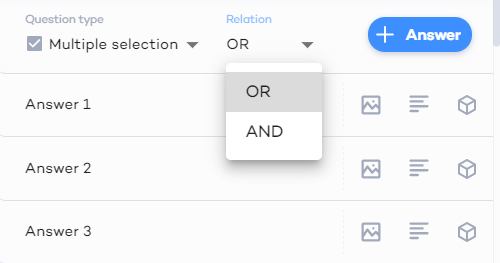 |
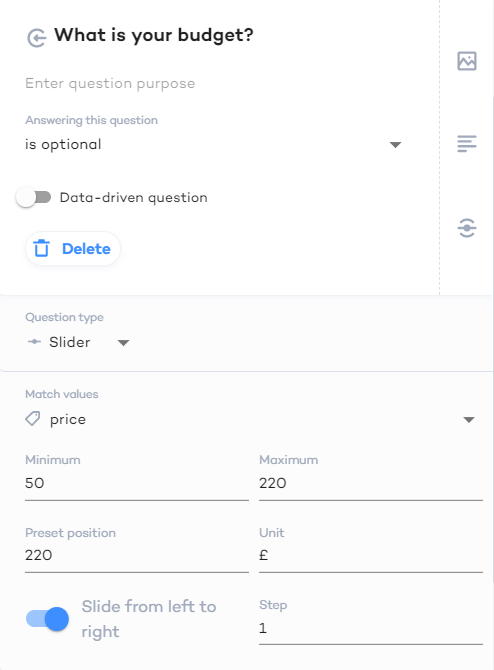
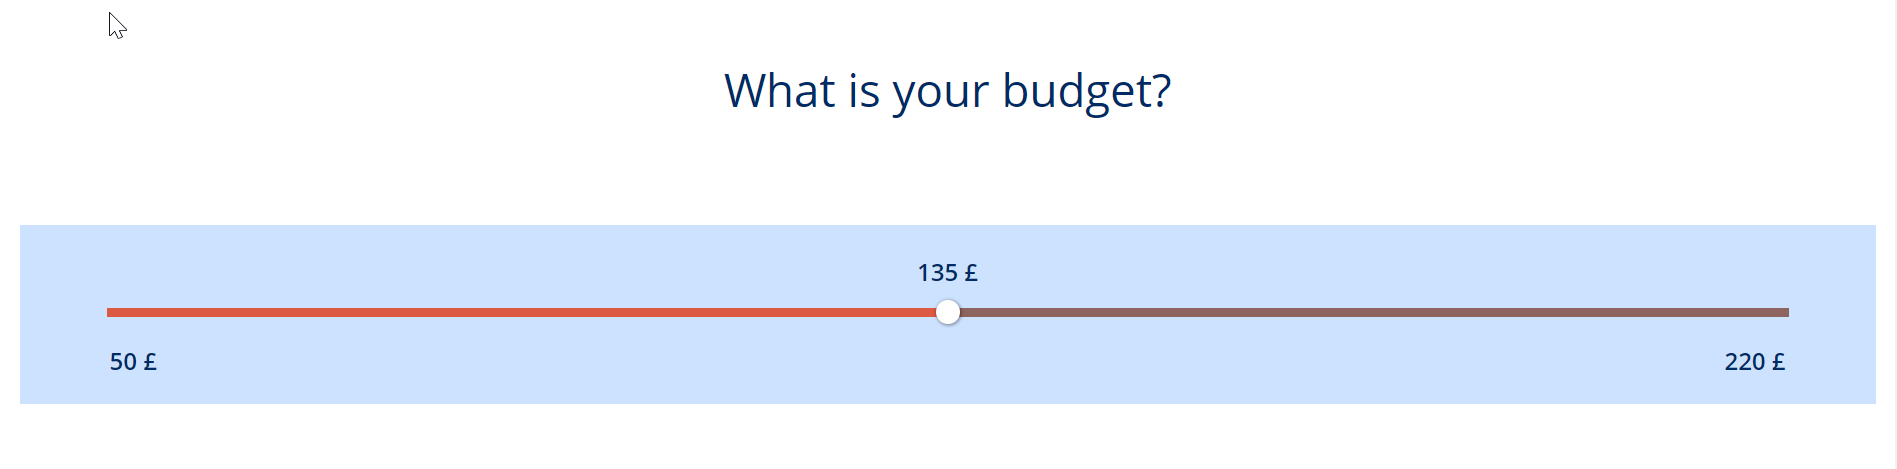
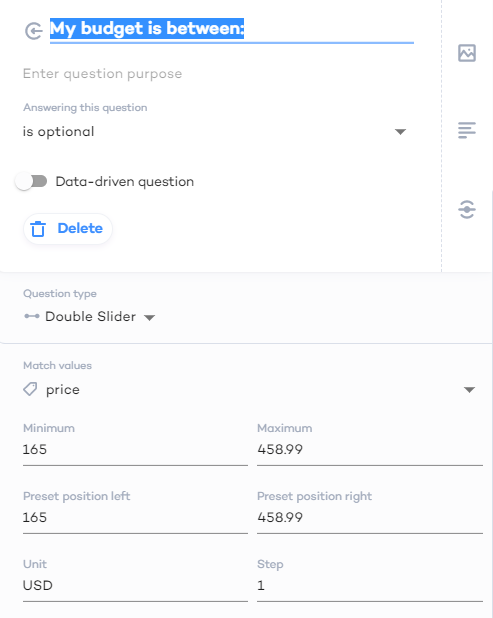
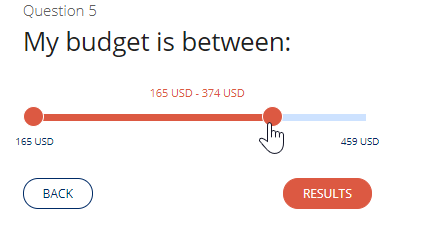
2.3 Create and Modify Sliders
Sliders are a great option for questions that can be answered by a value or range of values. This can be the age of the customer, budget, number of users of the products, etc.
1. Select the question type: Choose "Slider" or "Double Slider" as the answer type.
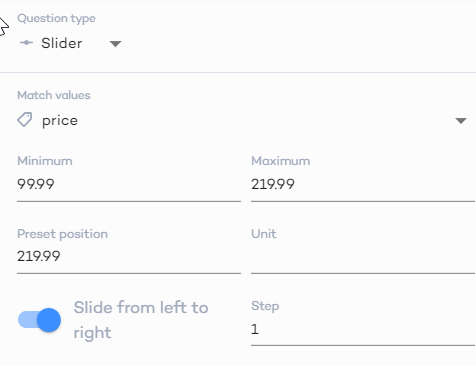 | 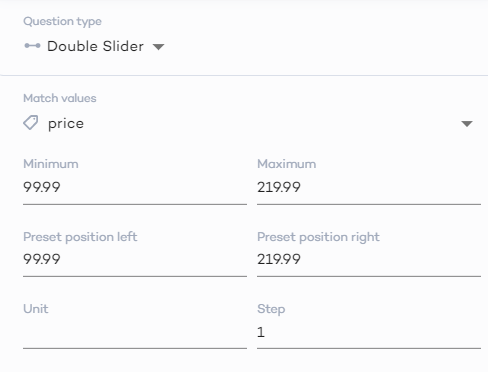 |
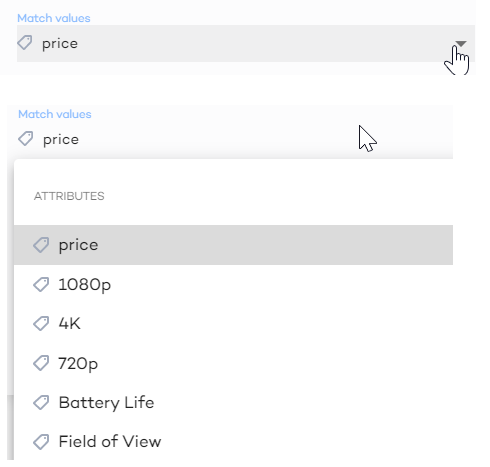
2. Select the match value: It's a product property, to which the answer is tied. For example, if the client defines the budget of the purchase, it will be tied to the price of the recommended products.
Imagine, that you want to consider the age of the client when choosing products to recommend. In such a case, the products in your catalog should have a property that corresponds to minimal age when it can be recommended. This is always, an integer or decimal value. To select it, click the arrow down by the "Match values" field.
|  |
3. Define the minimum and maximum values of the slider: Once you've selected the match value (step 1 above), minimal and maximal values available for the corresponding property will be automatically added as the minimum and maximum for your slider. However, you can update them.
4. Define the default position: Choose the value at which the slider shall be initially located.
For a single slider, it is the "Preset value" field.
For a double slider, these are "Position left" and "Position right
5. Define the units: select is the name of the measuring units to be displayed on the screen. The values will still be treated by the system as matching the value chosen at step 1.
6. Select the slider step: define by how many units the slider will move at a time.
7. Define the single slider direction: Select if you want the slider to be moved from left to right (if enabled), or from right to left (if disabled).
| In the Editor | In the Product Finder |
 |  |
| In the Editor | In the Product Finder |
 |  |
2.4 Create and Modify Lead Generation Answers
"Lead generation" Answers are created to collect information about the customer. Later on, this information can be collected and processed by you.
This is an example of a lead generation answer in the Product Finder.
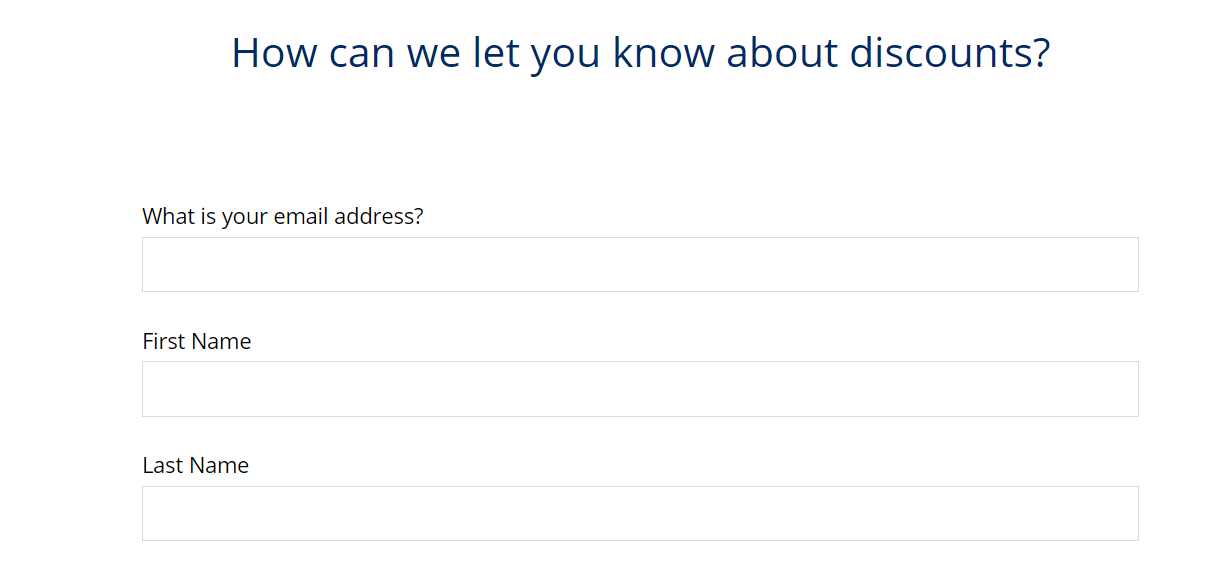
The "Lead generation" answers may contain multiple elements and are displayed in detail in the "Add a Lead Generation Form" document.
3. Removing and Deleting Questions
There are several things you can do:
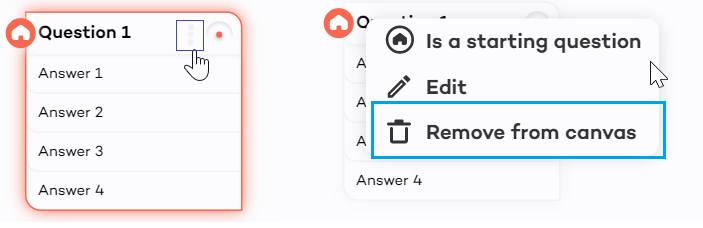
3.1. Remove Questions From the Canvas
Whenever you are removing a question from the Canvas, it will be available in the Question Bank, but all the related routes will be lost. To make it a part of the conversation again, you need to move it from the Question Bank to the Canvas.
To remove a question from the Canvas:
|  |
3.2. Delete a Question
Whenever you are deleting a question, it will be deleted from both Question Bank and the Canvas. All the settings related specifically to this question will be lost. Images added to the question and its answers will still be available in the Library.
To delete a question,
|  |
GOOD TO KNOW
If any of the standard themes is used, you can use html tags in questions, answers, and their descriptions.