Add Filter Panels to Your Product Finder to Help Your Customer Choose
Sometimes, even the best Product Finder can leave the customer with quite a number of the recommended products at the end. First of all, this might be your idea from the very beginning, because some things are just easier to choose with a click on a filter than reading a question and going through answers, so some options may be taken out to the filters and asked only with them. Secondly, filters can duplicate or rephrase some of the questions, letting your customers make a second choice or answer a question they've skipped.
From this article, you will learn how to add a filter panel to your Product Finder and modify it. In particular, how to use Dynamic Filter to make sure that the customer cannot create such a combination of options that there is nothing to offer them (unless you want them to).
In general, filters are managed from the Product Finder editor:

1. Filter Panels
For each Product Finder, there can be multiple filter panels, i.e. sets of filters for which the same filter panel settings have been defined. This means, that you can add several filter panels and apply different rules to the filters inside them.
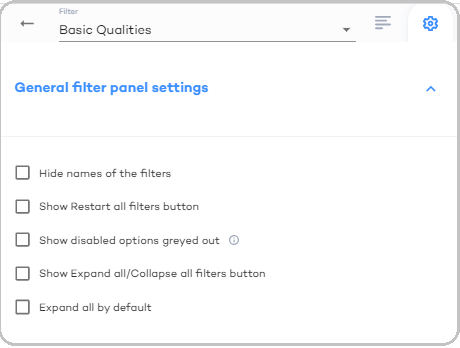
The Filter Panel settings define:
If the names of the filters shall be displayed for all the filters within this panel
If the button to restart shall be displayed for all the filters within this panel
If the buttons to expand all the answers or collapse them shall be displayed for all the filters within this panel
If by default all the options shall be displayed or collapsed for all the filters within this panel
If the options that are not available shall be greyed out or not displayed.
1.1. Create a Filter Panel
To create a filter panel, click the "+Filter" button in the filter panel. | 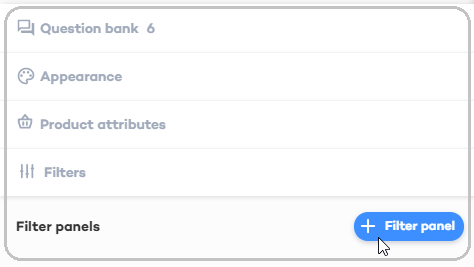 |
Define the name of the filter panel. This name will be displayed above the panel in the Finder. | 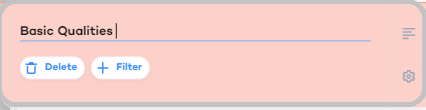 |
1.2. Edit Filter Panel Settings
Click the gear icon to access the filter panel settings. | 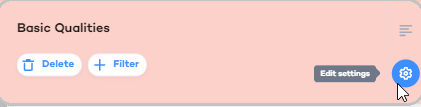 |
|  |
2. Filters
Filters are placed inside filter panels and can have a number of options. For each filter, you can define which options will be available and how many options should be displayed by default.
2.1. Create a Filter
To create a filter panel, click the "+Filter" button in the filter panel. | 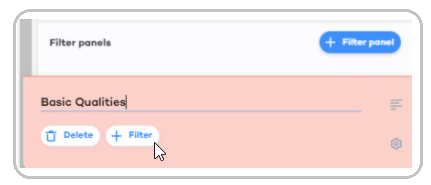 |
Define the name of the new filter. Basically, this is the text that will be visible to the customer above the set of filters. | 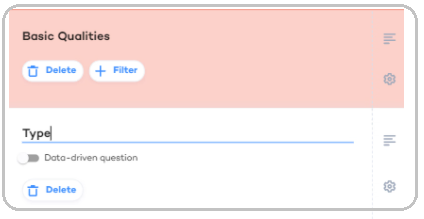 |
If necessary, you can add a description of the filter for your customers. Click the description icon to the right of the filter name. | 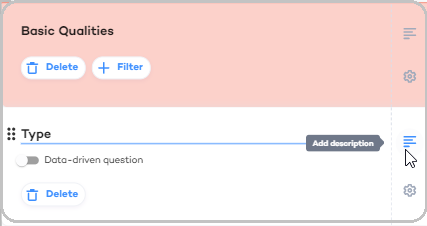 |
Add your description in the emerged field. This will be displayed as a hint that can be read by the customers. | 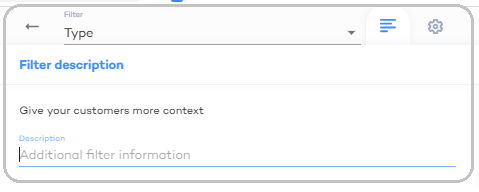 |
2.2. Define Filter Settings
In the filter settings, you can define the maximum amount of options displayed for the filter by default. |  |
3. Filter Options
Each filter can have any amount of options. Filter options are similar to answers to the questions in the flow. They are mapped to specific products. By default, the options selected by filters will override the options defined by answers to the questions.
To add an option, click the "+ Option" button below the filter name.
| 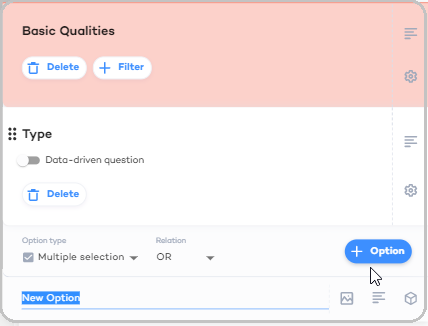 |
Define the option type. Types of the options are very similar to the types of the questions, except that leads cannot be generated from filters. To select the type correctly read the Select the Right Type for Answers or Filters article. | 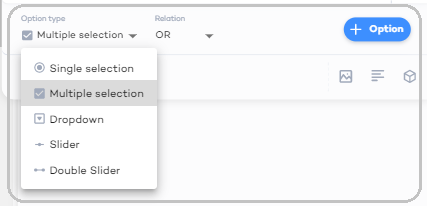 |
Define the name of the option. | 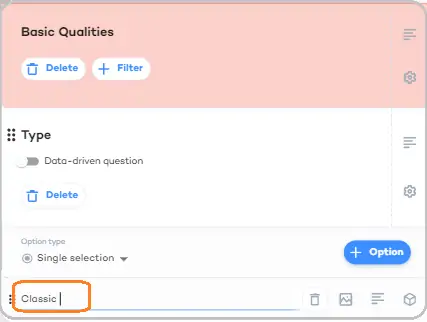 |
3.1. Settings of Filter Options
Settings of the options are very similar to the settings of the multiple-choice answers and sliders, as described in the "Create and Modify Questions and Answers" article.
You can: 1. Add an image: Select an image to illustrate the option. Images may be used along with the descriptions of the options or instead of them (subject to the settings of the Filter Panel). 2. Add a description: This will be displayed as a hint that can be read by the customers. The description can stay empty. |  |
3. Define the recommendation logic that will be used to decide which products shall be recommended for this option. answer and in what order the recommended products will be displayed.
3.2. Data-Driven Filters
If you want the list of options to coincide along with the values available for the specific attribute in the product catalog, define this filter as Data-Driven. Switch the toggle, and define the settings, as described in the Data-Driven Questions and Filters. | 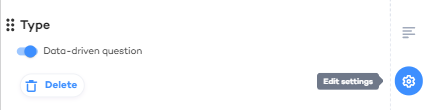 |