Update of the Product Catalog with Automated Feed
Introduction
Product Finder 360 needs to have a topical Product Catalog to recommend products to potential customers based on their answers. With the "Automated feed" feature, Product Finder 360 can make sure that your product catalog is always up to date and consistent with the information in your store.
For the feed to be successful, you need to make sure that the fields of uploaded files are mapped to the fields of the product catalog.
All the settings are available on the right of the "Product" page. |  |
This article will walk you through all the main steps of the feature set up:
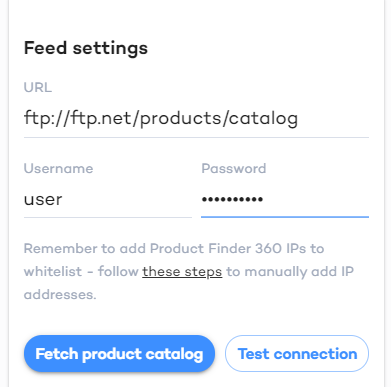
1. Set Up Connection With Your Server
To define the setting for connection with your server:
|  |
ATTENTION
The "Automated feed" feature may upload the file from HTTP, FTP or SFTP server.
For SFTP server, you also need to whitelist the IP address used by Product Finder 360: 52.31.133.200.
Please, contact your hosting provider or address our support in case of any questions.
2. Test and Fetch the Connection
To make sure that Product Finder 360 can access the requested file, click the "Test connection" button. If everything is OK, the success message will appear at the bottom left corner |  |
At this stage, you need to:
1. Fetch the catalog
2. Adjust the .csv file options
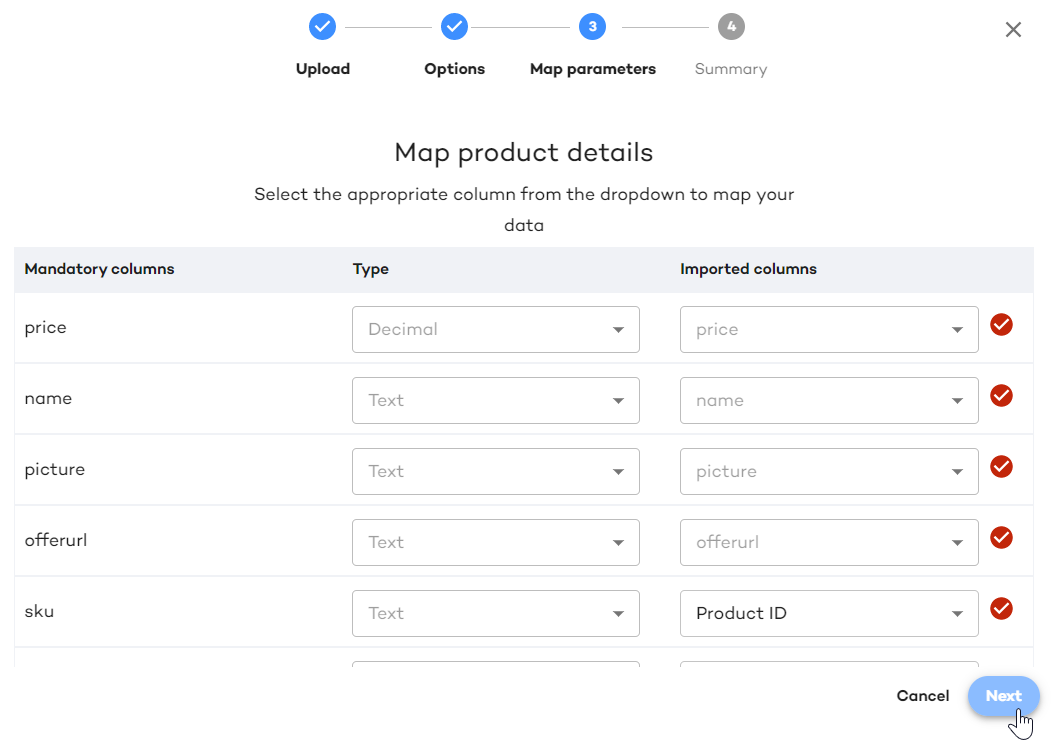
3. Adjust the product attributes mapping. Click the "Fetch product catalog" button.
ATTENTION
While testing the connection is recommended, fetching the catalog for the first time is mandatory before you can activate the feed.
Click the "Fetch product catalog" button |  |
"Downloading the latest product catalog" message will appear. |  |
As soon as the catalog has been downloaded, configure the .csv file options. | |
| 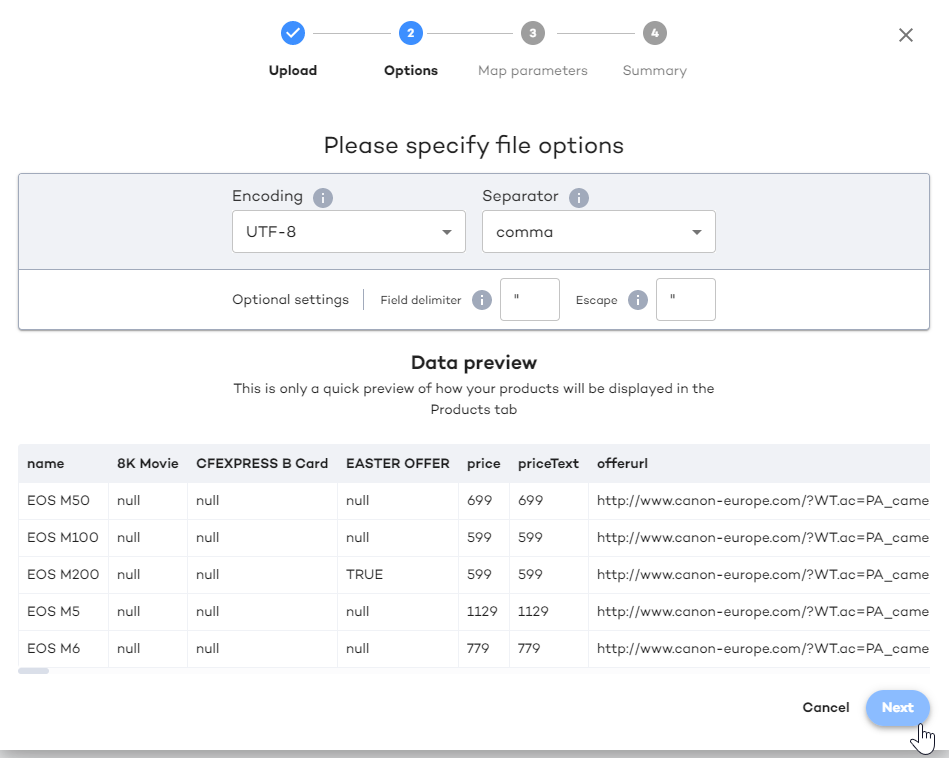 |
Click "Next" and map fields of your .csv file to your product catalog | |
 |
3. Schedule the Data Feed
Next, you have to specify the date and time of the first scheduled feed update. |  |
Remember!
Both the date and time of the first feed have to be selected.
Select the frequency of the updates in the "Frequency" drop-down menu. Consider the real frequency of your catalog changes when selecting the value to avoid unnecessary load on one hand and make sure that the products are always up to date on the other. | 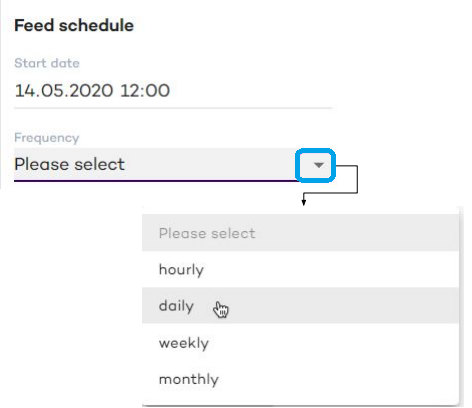 |
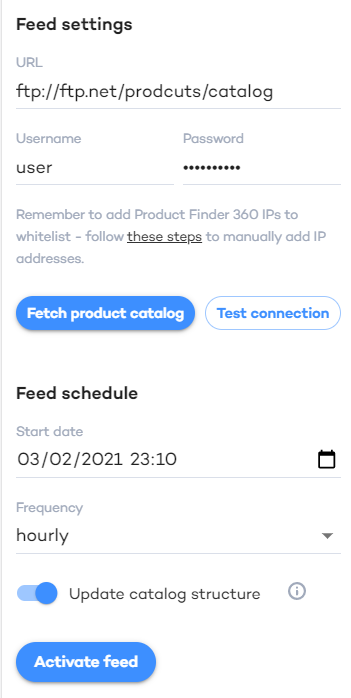
4. Enable the Catalog Structure Update
If the feature is enabled, whenever new attributes (columns of the product catalog) arrive with the automated feed, they will be automatically added to the catalog and will become available for usage in the Product Finder.If a new feed has fewer attributes than before (some of the catalog columns have been removed), the column will be marked correspondingly but will stay in the catalog with the latest provided values - this way the existing Product Finder will not be affected.
To enable/disable the feature, use the toggle below the "Feed schedule" section. |  |
5. Activate the Data Feed
Click the "Activate feed" button. If everything’s fine, it will turn into "Deactivate feed", which you can click later in case you decide to stop Product Finder 360 from downloading your product file.
|  |
ATTENTION
Remember that the setting changes will be applied to a live Product Finder only after you've Published this version of it.
6. Monitor Feed Activity
Once everything is up and running, you can monitor the activity of your data feeds, including the time of your last and next data imports. You’ll notice that handy boxes now appear in the Products tab: in the "Automated feed" section and under "Summary data". You can also view the History of your past feeds to check how your settings have changed over time. |  Feed settings |
Good to know
You can also fetch the product catalog at any moment of the Product Finder life if for whatever reason you need to initiate the catalog actualization manually (between the scheduled updates).